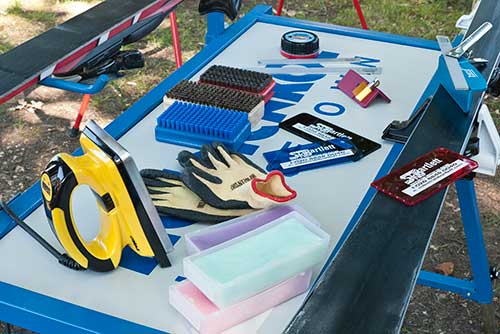
Ski Servicing – How? What? Why? A basic how to guide for ski servicing beginners…
The world of ski servicing can be very confusing. So many tools, so many methods – where do you start? Contrary to popular belief, ski servicing is easy; you just need a little bit of knowledge, a step-by-step process and a little bit of time.
The following is a basic starter guide to ski servicing. It will help you learn how to do it, why you should and which tools to use.
Why should you service your skis?
The two most important things to help you ski at your best are keeping your ski edges sharp and the bases waxed. This allows your skis to grip, turn and slide better, reminding you of that amazing feeling you had when your skis were new!
If you want to perform better on your skis, you have two options: you either take them regularly to a reputable servicing workshop and pay to get them serviced, or you could save some of your hard-earned wages and service them yourself …
The Ski Servicing Steps … STEP 1 Preparation and Cleaning > STEP 2 Base Repair > STEP 3 Edge Sharpening > STEP 4 Base Waxing > STEP 5 Base Finishing
STEP 1 – Preparation and Cleaning
If your skis haven’t been serviced before and have had a lot of use, you may need to get them professionally base ground before starting work on them yourself. Assemble your workbench and vices and make sure you have a clean, clear area to work. Lift up your ski brakes with brake retainers and make sure your skis are clean and dry before starting.
STEP 2 – Base Repair
The easiest way to repair holes in the base is by using a drip-in P-Tex repair candle. More permanent repairs can be achieved with a P-Tex gun; home use versions are now available.
Remove any protruding base material > Clean base using wax remover > Drip-in P-Tex or use a repair gun > Allow to cool to room temperature > Smooth by shaving off thin layers until smooth and flat > Brush or use base paper to smooth and blend the repair into the original base material
STEP 3 – Edge Sharpening
Always use a protective glove when sharpening the edges to prevent cutting your hand if you slip!
Clamp your skis in a vice with the side edge facing upwards. With a file and an appropriate edge sharpener, sharpen the edge, working from one end of the ski to the other. Use short, overlapping strokes, gradually lengthening them as you make each pass along the ski. Keep your file clear of filings after every few passes. Repeat these steps on both side edges. It doesn’t matter if you are moving the file from tip to tail, or tail to tip. Don’t press too hard; let the sharp file do the work!
STEP 4 – Base Waxing
Turn the ski over in the vice so that the base is now facing upwards. Scrape the base with a plastic scraper to remove any old wax and dirt. A great way to properly clean the base is to “hot scrape”, ironing on wax and scraping the skis while the wax is still warm. This pulls out the dirt in the ski base while still nourishing the base.
You can either iron on wax or use a wipe-on paste wax. Waxing stops the skis drying out, reduces friction and helps the bases slide better, making your skis easier to control and also not so susceptible to damage. Hot waxing (ironing on the wax) is better for your skis, getting deeper into the pores of the base and lasting longer. You can also use paste waxes; these are easy to apply but don’t last as long, ideal as a top-up in between hot waxing. Both of these waxes are available as either a universal temperature wax or one specific to weather temperature. Universal waxes are an easy option and work in most snow conditions, but temperature-specific waxes run faster. The more often a base is waxed the more wax it will absorb; you ideally want to wax your skis every time you use them. Racers – wax for every training session. Recreational skiers – wax for every holiday and maybe supplement with another wax (or paste wax).
Clean the base with a scraper > “Hot scrape” to remove old wax > Wax with final wax > Allow to cool
STEP 5 – Base Finishing
Once you’ve finished waxing your skis, allow them to cool to room temperature. Using a sharp plastic scraper, scrape all the excess wax off of the surface of the skis; it’s what’s in the base that makes the skis run fast. Use a horsehair or nylon brush to smooth and polish the base.
Scrape to remove all excess wax > Brush to smooth and polish
For more detailed information, download our “Guide to Ski Servicing”
Ski Tuning courses are also available, individually, as a group, or at your club. Please contact us to make an appointment.
Ski Bartlett | Uxbridge Road | Hillingdon | Middx | UB10 ONP
T: 020 8848 0040 | E: [email protected] | W: SkiBartlett.com


![[GEAR] Ski Bartlett Guide To… Ski Servicing](https://www.inthesnow.com/wp-content/uploads/2016/03/edge-sharpening-skis.jpg)
